
When your computer feels sluggish during the boot process, checking which programs start with Windows is often the first step toward restoring peak performance. Many applications automatically configure themselves to launch the moment you log in, consuming valuable system resources before you even open your first browser tab. By learning how to manage these background processes, you can significantly reduce your boot time and free up memory for the tasks that actually matter to you.
The most direct way to view these processes is by opening the Task Manager. You can access this tool by pressing Ctrl + Shift + Esc on your keyboard or by right-clicking the taskbar and selecting the Task Manager option.
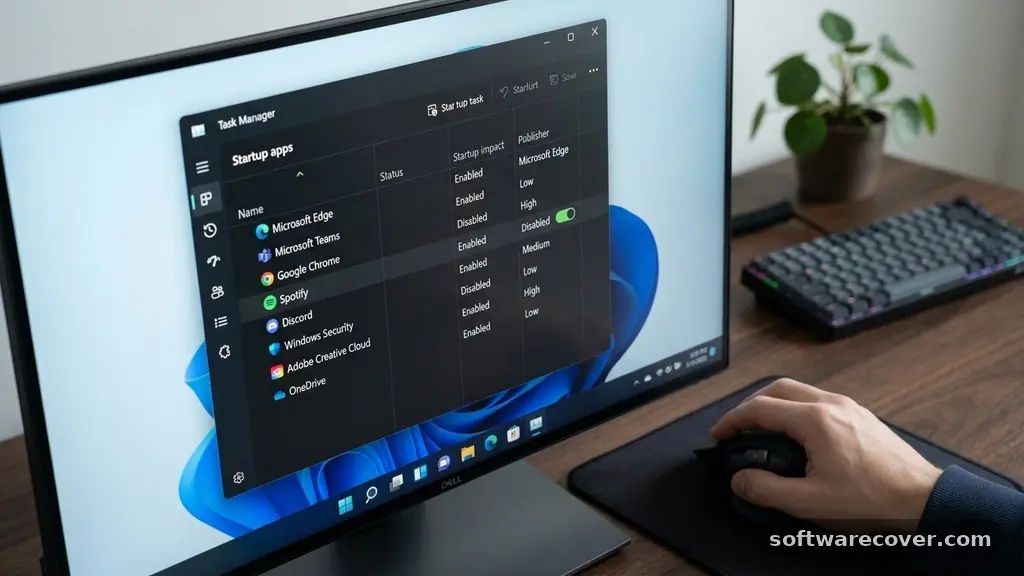
Once the window appears, navigate to the “Startup” tab located at the top of the interface. This list displays every application set to launch automatically, along with its current status and its measured impact on your computer’s startup time.
Utilizing the Task Manager for Startup Control
The Task Manager remains the most reliable utility for identifying apps that trigger automatically upon login. When you click on the Startup tab, you will see a list of software titles alongside their publisher and status.
If you spot a program you rarely use, you can simply right-click it and choose “Disable” to prevent it from running in the background. This action does not uninstall the software; it merely stops it from launching until you manually open it yourself.
You should pay close attention to the “Startup impact” column provided by Windows. This metric categorizes applications as having a “High,” “Medium,” or “Low” effect on your system’s boot speed.
Prioritize disabling programs marked with high impact if you notice your desktop takes a long time to become responsive after entering your password. Removing these bottlenecks often yields the most immediate improvement in perceived system performance.
Exploring the Settings Menu for Modern Apps
Windows 10 and 11 offer a more graphical alternative to the Task Manager through the main Settings menu. To find this, open your Start menu and click the gear icon to access Settings, then navigate to the “Apps” category.
From there, select the “Startup” menu item on the left-hand sidebar or in the main list. This view provides a cleaner, more user-friendly interface for toggling individual applications on or off.
This menu is particularly effective for managing modern apps downloaded from the Microsoft Store. Each entry typically includes a simple toggle switch, making it incredibly easy to experiment with disabling specific services to see if your system runs more efficiently. If you find that a particular tool is no longer necessary for your daily workflow, switching its status to “Off” here is a safe and reversible way to declutter your startup sequence.
Understanding the Impact of Background Services
Not every program you see in your startup list is a visible application like a web browser or a text editor. Many entries represent background services, such as cloud storage sync clients, printer drivers, or update checkers.
While these services often serve a purpose, having too many running simultaneously can lead to a crowded system tray and increased CPU usage. You must decide whether the convenience of instant synchronization outweighs the cost of slower boot performance.
If you are unsure about a specific entry, you can right-click it and select “Search online” in the Task Manager. This will open your default browser to show information about the process, helping you determine if it is a critical system file or a third-party app.
Never disable items related to your audio, display, or security software, as these are essential for your computer to function correctly. Always prioritize removing software you installed yourself but no longer use.
Managing Startup Items via Registry and Folders
Advanced users sometimes look beyond the standard menus to find hidden startup items. Windows maintains a specific folder known as the “Startup folder” where shortcuts to applications are placed to trigger them upon login.
You can access this by pressing the Windows key + R, typing “shell:startup,” and hitting Enter. Any shortcut you see in this folder will launch automatically whenever your account signs in.
Beyond folders, some programs register themselves deep within the Windows Registry. While beginners should generally avoid editing the registry directly, tools like the Microsoft Autoruns utility provide a comprehensive view of every single location where startup items might hide.
This level of detail is useful if you suspect a piece of persistent software is still launching despite your efforts to disable it through standard menus. Use such advanced tools with caution, as improper changes can disrupt system stability.
Comparing Methods for Startup Management
Different tools serve different needs, and choosing the right one depends on your comfort level with system administration. While the Settings menu is approachable, the Task Manager offers deeper diagnostic data. The table below summarizes the primary ways to manage your startup environment to help you decide which approach fits your current needs.
| Method | Ease of Use | Depth of Data | Best For |
|---|---|---|---|
| Settings Menu | Very High | Basic | Casual users and modern apps |
| Task Manager | High | Moderate | Quick fixes and impact analysis |
| Startup Folder | Moderate | Low | Manually adding/removing files |
| Autoruns Tool | Low | Extreme | Troubleshooting persistent issues |
Common Categories of Startup Programs
Most of the items you encounter when checking your startup list fall into a few predictable categories. Recognizing these groups makes it easier to clean up your system without worrying about breaking essential functions. Many users find that a significant portion of their startup list consists of software they simply do not need to have running at all times.
- Cloud Sync Clients: Services like OneDrive, Dropbox, or Google Drive that keep your files updated in real-time.
- Communication Tools: Apps like Discord, Skype, or Slack that aim to keep you connected immediately upon login.
- Update Checkers: Small background processes that periodically ping servers to see if your installed software needs a patch.
- Hardware Utilities: Drivers for gaming mice, specialized keyboards, or printer control panels that manage custom settings.
- Media Players: Background agents for streaming services or music players that pre-load for faster playback.
Troubleshooting Persistent Startup Issues
Sometimes, a program will persistently reappear in your startup list even after you have disabled it. This often happens because the software includes its own internal setting for “Launch at Windows Startup” which overrides the system-level changes you made.
If you find an app behaving this way, open the software’s own preferences menu. You will frequently find a checkbox there that specifically controls the auto-start behavior.
If the app refuses to stay disabled, it might be running as a scheduled task. You can check this by typing “Task Scheduler” into the Windows search bar and looking through the “Task Scheduler Library.”
Disable any tasks that point to the offending program, but be very careful not to disable any tasks that appear to be associated with Windows or your hardware drivers. This is a common culprit for software that seems to “self-heal” its startup entry.
Maintaining System Health Over Time
Regularly auditing your startup list is a healthy practice for any computer user. Over time, as you install and remove various applications, your startup sequence can become cluttered with leftovers from programs you no longer use. I recommend setting a reminder to review these settings every few months, especially if you notice your system feeling sluggish after a major software update.
By keeping the number of active startup items to a minimum, you extend the life of your hardware by reducing unnecessary CPU and memory load during the boot process. A lean startup sequence ensures that your machine is ready to work the moment you sit down, rather than forcing you to wait for a dozen background tasks to finish initializing. Taking control of these settings puts you in the driver’s seat of your digital environment.
Frequently Asked Questions
Does disabling a program in Task Manager delete it?
No, disabling a program in the Task Manager does not delete or uninstall it. It simply prevents that specific application from launching automatically when you sign into your computer. You can still open the program manually whenever you need to use it.
Why do some programs show a “Not measured” impact?
The “Not measured” label appears when Windows has not yet gathered enough data to determine how much that specific program slows down your boot time. This is common for newly installed applications or those that have recently been updated. It does not necessarily mean the program is harmful or heavy, just that the system is still learning its behavior.
Should I disable everything in the startup list?
You should not disable every single item, as some are required for your system to function normally. Always keep essential services for security, audio, and display drivers enabled. Focus your cleanup efforts on third-party applications like chat tools, game launchers, or cloud storage clients that you do not need to access immediately upon starting your computer.
Can I add my own programs to the startup list?
Yes, you can easily add your own programs to the startup sequence. Simply open the “shell:startup” folder as described in the article and paste a shortcut to your desired application into that window. The next time you log in, Windows will automatically open that program for you.
Does a faster boot time improve overall performance?
A faster boot time primarily improves the speed at which your desktop becomes usable after you log in. While it won’t necessarily make your processor faster during heavy tasks, it does free up memory and CPU resources that were previously being hogged by background apps. This makes your computer feel snappier and more responsive during day-to-day use.
Checking which programs start with Windows is an essential skill for anyone looking to optimize their computing experience. By systematically reviewing your startup list through the Task Manager or Settings menu, you can eliminate unnecessary bloat and reclaim your system’s resources. Remember to focus on the programs you recognize and use daily, while leaving critical system drivers untouched to ensure stability.
If you find that your computer still struggles even after cleaning up your startup items, consider that other factors like disk health or background system processes might be at play. However, for most users, this simple maintenance step provides the most noticeable boost in speed. Take a moment today to review your settings, and enjoy a much faster and more efficient login process every time you power on your machine.