
Finding the best Free Screenshot Tools for Windows in 2026 is simpler than ever, thanks to significant updates in native software and the continued evolution of powerful open-source projects. Whether you need to grab a quick image for a presentation or require advanced annotation features for professional documentation, current options provide high-quality results without costing a dime.
This overview explores the most reliable applications available today, helping you choose the right utility for your specific workflow. By understanding the unique strengths of each program, you can streamline your screen capture process and ensure your digital communication remains clear, professional, and highly effective throughout the year.
The Native Windows Snipping Tool
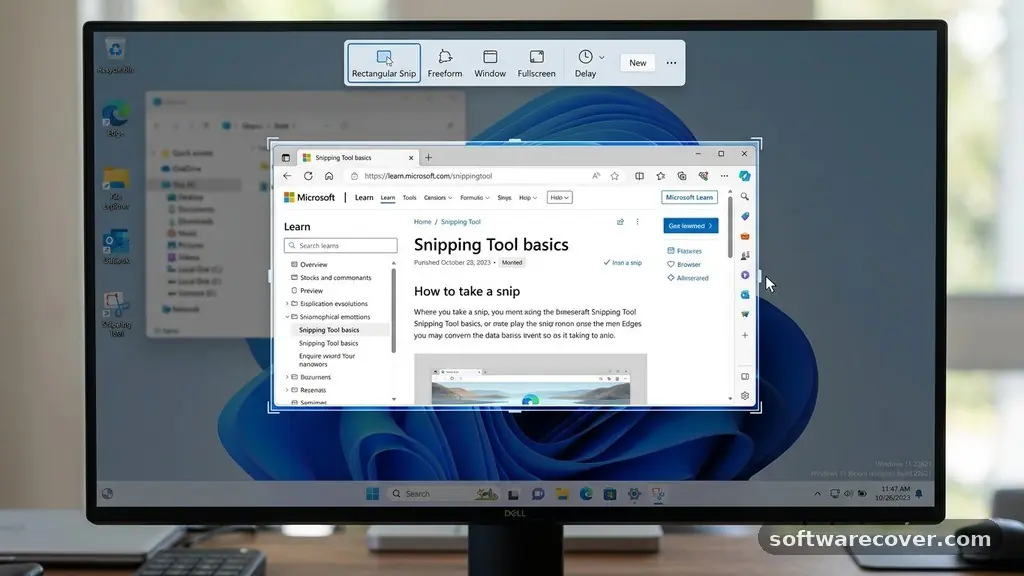
The built-in Windows Snipping Tool has undergone a massive transformation in recent years, making it a primary choice for most users. It is no longer just a basic utility for grabbing rectangular areas of your desktop.
Microsoft has integrated advanced features that allow for screen recording, text extraction from images, and even automatic text redaction. These capabilities mean that many users no longer need to install third-party software for day-to-day tasks.
When you trigger the tool using the standard Windows + Shift + S shortcut, you gain immediate access to a variety of modes. You can capture a freeform shape, a specific window, or the entire screen with ease.
The interface is clean, fast, and light on system resources, which is a major advantage for laptops with limited RAM. It also supports basic annotation tools like highlighters and pens, which are perfect for quick markups before you share a file with a colleague.
For those who rely on high-resolution displays, the tool handles scaling perfectly. It captures crisp images that retain the quality of your monitor’s output, ensuring that text remains readable even after you copy it to the clipboard.
The integration with the broader Windows ecosystem, such as the Photos app and OneDrive, makes saving and organizing your captures effortless. If your needs are relatively simple, sticking with this native solution is often the most efficient path.
Power User Features in ShareX
If you require advanced automation or professional-grade customization, ShareX stands out as the industry standard for power users. It is an open-source project that has been refined over a decade, offering a level of control that few other tools can match. You can customize nearly every aspect of the capture process, including specific hotkeys for different regions, delayed captures, and automated file naming conventions.
One of the most impressive aspects of this software is its ability to perform post-capture tasks automatically. For example, you can set it to upload every capture to a specific cloud storage service, shorten the URL, and copy the link to your clipboard in a single motion.
This workflow is incredibly useful for developers, technical writers, and support staff who share images frequently. It also includes an extensive suite of image editing tools, such as pixelation, watermarking, and custom shapes.
Beyond static images, the software handles screen recording and GIF creation with high precision. You can define custom frame rates and output quality settings to keep file sizes manageable while maintaining visual fidelity.
Because it is highly configurable, it might feel slightly intimidating at first. However, once you invest a few minutes into setting up your preferred profiles, it becomes an indispensable part of your daily toolkit.
Greenshot for Efficient Workflows
Greenshot is another long-standing favorite that focuses on speed and simplicity. It sits quietly in your system tray and waits for your command, making it one of the most unobtrusive options available.
When you press your chosen key, it provides a highly responsive interface for selecting a region. It excels at capturing scrolling windows, which is a common requirement when you need to document an entire webpage or a long document.
The editor that appears after a capture is where this tool really shines. It provides a set of intuitive tools for adding arrows, speech bubbles, and numbered highlights.
These features are specifically designed for people who need to create quick tutorials or explain complex processes to others. The ability to export your work directly to Microsoft Office applications or email clients adds another layer of efficiency to your daily tasks.
While the project has seen fewer frequent updates compared to some newer tools, it remains rock-solid on modern versions of Windows. Its lightweight nature ensures that it never interferes with your system performance, even during intensive tasks.
For users who value a distraction-free environment, this is a top-tier choice. You can find more information on general screen capture standards through official documentation at the Microsoft support portal.
Comparing Popular Capture Utilities
Choosing the right software depends heavily on your specific requirements and technical comfort level. Some users prioritize ease of use, while others require deep customization and automation features. The following table highlights the primary differences between the most effective options currently available for Windows users.
| Tool Name | Best For | Primary Strength |
|---|---|---|
| Snipping Tool | Casual Users | Native integration and zero setup |
| ShareX | Power Users | Extensive automation and workflows |
| Greenshot | Productivity | Fast editing and office integration |
| PicPick | Designers | Integrated ruler and color picker |
Each of these tools provides a unique balance of features. If you are a designer, for instance, you might prefer PicPick because it includes a built-in color picker and a pixel ruler, which are invaluable for web development projects.
Conversely, if you are a student or a home user, the built-in Windows tools or Greenshot will likely cover every need you encounter. Selecting the right tool is about matching the software’s capabilities to your most frequent tasks.
The Importance of Annotation Tools
Capturing an image is only half the battle; communicating effectively often requires adding context. A raw screenshot can be confusing, but an annotated one tells a clear story.
The best tools include features like arrows, boxes, and text labels that help draw the viewer’s eye to the most important part of the screen. When you use these features consistently, you reduce the need for long, explanatory emails or follow-up conversations.
Many free tools also offer advanced annotation features like blur or pixelation. These are essential for privacy, allowing you to hide sensitive information like usernames, email addresses, or private data before you share a file with someone else.
Being able to perform these edits within the same application you used to capture the screen saves significant time. It prevents the need to open a separate image editor like Photoshop or GIMP for minor adjustments.
When selecting your preferred software, look for one that makes these annotations feel natural. The best interfaces allow you to click, drag, and drop elements without digging through complex menus.
The ability to change colors and line thickness is also helpful for making your markups stand out against different backgrounds. A good annotation suite should feel like an extension of your own thought process.
Managing Your Capture Library
Once you begin taking screenshots regularly, managing your files becomes a challenge. Without a clear strategy, your desktop or downloads folder can quickly become cluttered with hundreds of unnamed images.
Many of the best free screenshot tools for Windows in 2026 include features that help you stay organized from the moment you take a snapshot. You can set automatic file naming patterns, such as including the date and time, which makes finding specific files later much easier.
Some applications allow you to define a specific folder for your captures, separate from your general downloads. This simple step keeps your workspace clean and makes it easy to back up your collection to the cloud.
You should also consider whether you want to save files in different formats. PNG is generally better for text and UI elements because it provides lossless compression, while JPEG is often preferred for photographs to keep file sizes small.
If you share files frequently, look for tools that offer a “copy to clipboard” function as the default action. This allows you to paste the image directly into an instant messaging app or a document without needing to save a physical file on your hard drive first.
This approach is much faster and helps keep your local storage tidy. It is a small habit that significantly speeds up your daily interaction with colleagues or friends.
Security and Privacy Considerations
Using third-party software for screen capture requires a level of trust in the developer. While the tools mentioned here are widely regarded as safe and reputable, you should always download them from official sources.
Avoid third-party “download manager” sites that might bundle unwanted software with your installation. Stick to the developer’s official website or a trusted repository to ensure you are getting the clean, original version of the program.
Privacy is also a major concern when your screenshots contain sensitive data. Some tools offer cloud-sharing features that automatically upload your captures to a server. While convenient, you should be mindful of what you are uploading.
Ensure that your settings are configured to keep private information local unless you explicitly choose to share it. If you are working in a highly sensitive environment, consider tools that offer offline-only modes.
Most modern tools provide settings to disable automatic uploads entirely. This is often the best choice for professionals who work with proprietary data or personal information.
By reviewing your settings periodically, you can ensure that your workflow remains secure. Remember that a screenshot is a digital file, and it should be treated with the same level of care as any other document containing personal or sensitive information.
Frequently Asked Questions
What is the easiest screenshot tool for beginners?
The built-in Windows Snipping Tool is the best choice for beginners. It requires no installation, is already optimized for your system, and covers all the standard needs for capturing and basic editing.
Can I record my screen with these free tools?
Yes, many of the top tools like ShareX and the native Windows Snipping Tool include screen recording capabilities. These allow you to capture video of your desktop, which is perfect for creating quick demonstrations or troubleshooting guides.
Is it possible to capture scrolling webpages with these tools?
Tools like Greenshot and ShareX are specifically designed to handle scrolling captures. This allows you to grab a single long image of an entire webpage or a document that extends beyond the visible area of your screen.
Do these tools work on Windows 11?
All the tools mentioned in this article are fully compatible with Windows 11. They are designed to integrate well with the modern interface, ensuring that your capture process remains smooth and efficient on the latest operating system updates.
Are these tools truly free to use?
Yes, the tools discussed, including ShareX and Greenshot, are either open-source or completely free for personal use. They do not require a subscription, and they provide their full range of features without hidden paywalls or limitations.
Optimising Your Screen Capture Workflow
The best Free Screenshot Tools for Windows in 2026 provide you with the power to document, share, and communicate with clarity. By choosing the right utility for your specific needs, you can turn a mundane task into a seamless part of your daily productivity. Whether you stick with the native Windows tools or decide to explore the advanced features of open-source projects, the key is to find a system that works for you.
Start by identifying the tasks you perform most often, such as sharing quick clips or creating detailed annotated guides. Once you have your preferred tool installed and configured to your liking, you will find that your workflow becomes significantly faster and more professional.
Feel free to try a few different options to see which interface feels most natural to you. Sharing your screen should never be a source of frustration, and with these tools, it will remain a simple, effective part of your digital life.