
When your computer starts throwing low-disk-space warnings, finding large files taking up disk space becomes an immediate priority. You don’t need to be a technical expert to reclaim your storage, as Windows offers several built-in tools and third-party utilities that make the process straightforward.
By identifying exactly which folders and documents are hoarding your precious gigabytes, you can quickly clear out the digital clutter and restore your system’s performance. This article explains how to identify these culprits, ranging from simple built-in features to advanced disk mapping software, ensuring you regain control of your storage capacity without unnecessary stress.
Using Windows Storage Sense for Quick Cleanup
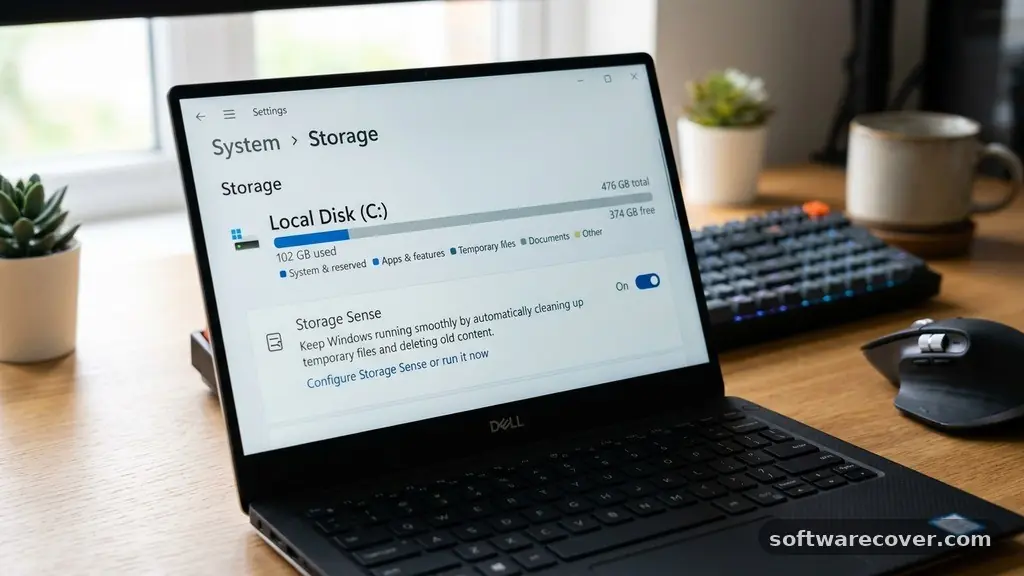
Windows includes a feature called Storage Sense that serves as your first line of defense against bloated drives. You can access this by opening your Settings menu, navigating to System, and selecting Storage. This tool automatically tracks your disk usage and identifies categories like temporary files, system files, and large applications that are occupying your space.
Storage Sense is particularly useful because it provides a visual breakdown of what is taking up room on your drive. It categorizes data into buckets such as Apps & features, Temporary files, and Other people. Clicking on these categories allows you to drill down into specific folders where you might find large files taking up disk space that you haven’t touched in years.
You can also configure Storage Sense to run automatically to keep your drive clean over time. It can delete files in your Recycle Bin or clear out items in your Downloads folder after a set duration. This proactive approach prevents the accumulation of junk files that often go unnoticed, keeping your drive running smoothly without manual intervention.
Leveraging Specialized Disk Space Analyzers
For a more granular look at your file system, dedicated software is often superior to built-in tools. Programs like WizTree and WinDirStat are designed specifically to map your entire drive visually. They represent files as colored blocks, where the size of the block corresponds directly to the file size on your hard drive.
WizTree is exceptionally fast because it reads the Master File Table (MFT) directly from your NTFS-formatted partition. This bypasses the slow process of scanning every individual file, allowing it to generate a report in seconds. When you see a massive block on your screen, you can right-click it to open the file location or delete it immediately.
WinDirStat is a classic alternative that works similarly, though it scans the entire drive file-by-file, which can take significantly longer on larger mechanical hard drives or high-capacity SSDs. These tools are indispensable when you need to see exactly what is consuming your storage, as they expose hidden files that File Explorer might ignore or obscure. You can find more information on managing storage from the official Microsoft support pages regarding disk cleanup.
Searching Manually Within File Explorer
If you prefer not to install third-party software, File Explorer has built-in search filters that are surprisingly effective for locating large files. You can open any folder or drive, click into the search bar, and use specific size operators to narrow down your results. For instance, typing “size:gigantic” into the search bar will show you every file larger than 128 MB.
You can also customize these searches to be more precise by using specific ranges. If you want to find files between 500 MB and 1 GB, you can type “size:500MB-1GB” in the search box. This method is excellent for identifying large media files, such as high-definition videos or forgotten installer packages, that are hidden deep within your user directories.
This manual approach works best when you are already inside a specific directory, such as your “Documents” or “Videos” folder. It prevents the system from searching the entire drive at once, which can be taxing on older hardware. By focusing your search, you can isolate those large files taking up disk space that are likely candidates for deletion or archiving.
Identifying and Removing Duplicate Files
Often, the reason your disk is full isn’t just one giant file, but rather dozens of copies of the same file. Duplicate photos, documents, and installers can accumulate over months of usage. Finding these duplicates manually is nearly impossible, so using a dedicated duplicate file finder is the most efficient path forward.
These tools scan your drives for files that have identical content, regardless of their file names. Once the scan is complete, you can review the list of duplicates and safely delete the extra copies. This process can often free up several gigabytes of space in just a few minutes, especially if you have a habit of backing up folders without cleaning up the old versions.
Be careful when using these tools to ensure you aren’t deleting system files or essential application data. Most reputable duplicate file finders provide a preview feature that lets you verify the file path before you decide to purge it. Always prioritize deleting duplicates in your personal user folders rather than system directories.
Using Command Prompt and PowerShell for Precision
Advanced users can utilize the Command Prompt or PowerShell to find large files without a graphical interface. These tools provide a level of control that standard windows cannot match. For example, a simple PowerShell script can list every file larger than a specific size across your entire C: drive.
Using commands like “Get-ChildItem” allows you to filter and sort files by size, creation date, or file extension. This is particularly useful for system administrators or users who want to automate the process of finding large files taking up disk space. You can pipe the output to a text file if you need to review a long list of candidates for deletion later.
While the learning curve is steeper than using a visual tool, the speed and efficiency of command-line operations are unmatched. You won’t be slowed down by graphical animations or interface limitations. Once you master a few basic commands, you can perform deep-system maintenance in a fraction of the time it takes to click through folders.
Comparing Storage Management Methods
Choosing the right method depends on your technical comfort level and the specific nature of your storage issues. Some methods are better for quick fixes, while others provide the deep analysis required for long-term maintenance. The table below outlines how these different approaches compare in terms of effort and effectiveness.
| Method | Ease of Use | Best For | Speed |
|---|---|---|---|
| Storage Sense | Very Easy | Temporary/System files | Fast |
| File Explorer Search | Easy | Quick manual cleanup | Medium |
| Disk Space Analyzers | Moderate | Deep visual cleanup | Very Fast |
| PowerShell/CMD | Advanced | Automated/Specific tasks | Very Fast |
Managing Temporary Files and System Cache
Your computer constantly generates temporary files and cache data that can grow to massive sizes over time. Browser caches, update installers, and temporary application data are often stored in hidden directories. These files are necessary for performance while you are using the apps, but they often linger long after they have outlived their usefulness.
You can often clean these out by running the Disk Cleanup utility. This built-in tool targets specific folders like the Windows Update Cleanup, which can sometimes hold several gigabytes of old installation files. Regularly clearing your temporary folders is a vital step in maintaining a healthy, responsive operating system.
If you are comfortable, you can also manually empty the “%temp%” folder in Windows. Pressing Windows key + R and typing “%temp%” will take you directly to the directory where many applications dump their temporary data. Deleting the contents of this folder is generally safe, though you may need to skip files that are currently in use by active applications.
Common Questions About Disk Space
What is the safest way to clear space without deleting important files?
The safest approach is to use the Windows Disk Cleanup utility or Storage Sense. These tools are designed to identify files that are explicitly marked as “safe to delete,” such as temporary files or old Windows update backups. Avoid deleting files from the Windows or Program Files folders unless you are absolutely certain of what they are.
How do I know if a large file is needed by the system?
Generally, any file located inside the “Windows” folder or “Program Files” should be left alone unless you are uninstalling a specific application. If you aren’t sure, right-click the file and select Properties to see the file creator or developer. If the file is a personal document, video, or photo, it is almost certainly safe to delete.
Does moving files to an external drive actually help?
Yes, moving large media files, like videos or high-resolution photos, to an external hard drive or cloud storage is an excellent way to reclaim space. It keeps your primary SSD or hard drive lean for the operating system and applications. This also serves as a secondary backup for your most important data.
Why does my disk usage keep growing even after I delete files?
This is often caused by system restore points, hibernation files, or ongoing log generation. Windows automatically creates restore points that can consume significant space. You can manage these settings in the System Protection tab within the System Properties menu to limit how much space they are allowed to occupy.
Can I delete everything in my Downloads folder?
You can delete the contents of your Downloads folder, but be aware that it might contain important installers or documents you haven’t moved yet. It is best to sort the folder by size or date before deleting. This allows you to keep recent or important files while clearing out the old installers you no longer need.
Conclusion
Finding large files taking up disk space is a manageable task that pays off with a faster, more reliable computer. Whether you start with the simplicity of Storage Sense or dive into the visual power of a specialized disk analyzer, the goal remains the same: reclaiming room for the things that matter. By making this a regular part of your digital maintenance routine, you prevent the frustration of sudden “low disk space” errors.
Start by running a quick scan with a tool like WizTree today to see exactly what is hiding in your folders. Once you identify the largest offenders, take a moment to delete or move them to external storage.
Your system will reward you with improved performance and, more importantly, the peace of mind that comes with a clean, well-organized drive. If you have questions about specific files, don’t hesitate to research them before hitting the delete key.