
Learning the process of uninstalling Programs That Won’t Delete on Windows is an essential skill for keeping your computer running smoothly. Whether you are dealing with a stubborn background process, a corrupted file, or a software installer that simply refuses to cooperate, you don’t have to settle for digital clutter. Taking control of your system involves knowing exactly which tools to use and when to step away from the standard settings.
This article provides a clear path forward, ensuring you can remove unwanted files safely and effectively. You’ll gain the confidence to manage your software environment, free up valuable disk space, and resolve those annoying error messages once and for all.
Fixing Stubborn Software via the Control Panel
The first step in addressing any software that won’t leave your system is to revisit the classic Windows tools. Often, a program appears to be stuck because the uninstaller package itself has become corrupted or is failing to trigger correctly.
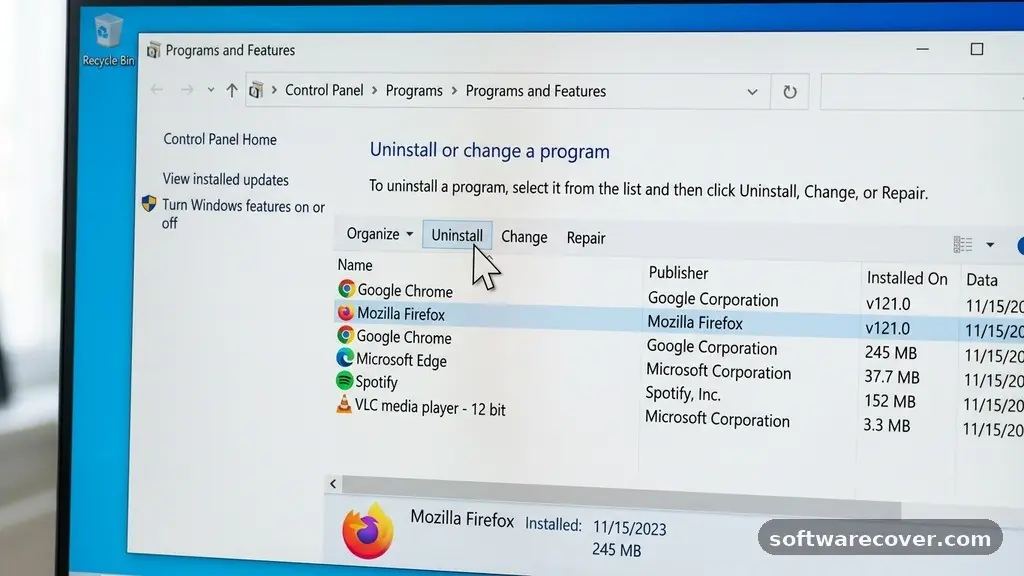
To begin, press the Windows key and type “Control Panel” to open the legacy settings menu. Navigate to “Programs and Features” to see a full list of everything currently installed on your machine.
Once you find the problematic application, right-click it and select “Uninstall.” If the default uninstaller fails, it may be due to a background process still running in the background.
Open your Task Manager by pressing Ctrl + Shift + Esc and look for any active instances of the program. If you find one, select it and click “End Task” before attempting the removal process again.
Sometimes, the standard Windows interface is insufficient because the app has already been partially removed. If you see the program listed but the “Uninstall” button is greyed out or unresponsive, try repairing the installation instead.
Right-click the entry and look for a “Repair” option if it exists. Running the repair tool often restores the necessary files required to complete the standard uninstallation procedure successfully.
Using the Microsoft Program Install and Uninstall Troubleshooter
When the standard methods fail, you should look toward official support tools designed by the developers of the operating system. Microsoft provides a specific utility that helps users resolve issues when they encounter errors during the installation or removal of software. You can download the Microsoft Program Install and Uninstall Troubleshooter directly from their official support pages to address these registry-level conflicts.
This tool acts as an automated technician that scans your system for corrupted registry keys. These keys are often the culprits when Windows believes a program is still present, even if the files have been deleted.
The troubleshooter will ask if you are having trouble installing or uninstalling a piece of software. Select “Uninstalling” and then pick the offending program from the list that appears.
The utility then attempts to force the removal of those specific registry entries that prevent a clean slate. It is highly effective for programs that were partially deleted or those that leave behind “ghost” entries in your settings.
Once the process completes, restart your computer to ensure all changes are applied correctly. This method is often the quickest way to resolve deep-seated conflicts without needing advanced technical knowledge.
Leveraging Third-Party Uninstaller Tools
If the built-in solutions do not yield results, third-party software offers a more aggressive approach to cleaning up your system. Applications like Revo Uninstaller or Geek Uninstaller are designed to go beyond what the standard Windows uninstaller can perform. These programs track every file, folder, and registry entry created during the initial installation of an app.
When you use one of these tools, it first attempts to run the official uninstaller provided by the software developer. If that fails, it initiates a “forced” mode that hunts down all associated files remaining on your hard drive.
This is particularly useful for stubborn programs that bury their components deep within the system directories. After the initial removal, these tools perform a deep scan to identify and delete leftover fragments.
Using a dedicated uninstaller is generally safe, provided you download reputable software from official sources. Always check the scan results before confirming the final deletion to ensure you aren’t removing files needed by other applications. These tools provide a clear list of what will be removed, giving you peace of mind before you hit the final delete button.
Safe Mode as a Last Resort
If a program continues to resist all removal attempts, it is likely because the file is locked by a core Windows process. Running your system in Safe Mode can bypass these restrictions because only the most essential drivers and services are loaded. To enter Safe Mode, hold the Shift key while clicking “Restart” from your Power menu in Windows.
Navigate through the blue screens by selecting “Troubleshoot,” then “Advanced Options,” “Startup Settings,” and finally “Restart.” When the computer reboots, press the number 4 or 5 to enter Safe Mode with networking. Once you are in this stripped-down environment, the software is far less likely to have active processes preventing its deletion.
You can now attempt to use the standard Control Panel or your preferred third-party uninstaller. Because background services are disabled, you should find that the file lock is released, allowing you to delete the folder or run the uninstaller without interruption. After you have successfully removed the program, simply restart your computer normally to return to your standard desktop environment.
Manual Registry Cleanup
Advanced users can sometimes resolve persistent software issues by manually editing the registry. This should be treated as a last resort, as incorrect changes can affect system stability.
Before proceeding, always create a System Restore point so you can revert your changes if something goes wrong. Press the Windows key + R, type “regedit,” and hit Enter to open the Registry Editor.
You will need to search for the software name within the HKEY_LOCAL_MACHINE\SOFTWARE and HKEY_CURRENT_USER\SOFTWARE keys. These directories contain the configuration data for almost every app you’ve ever installed.
Be very careful to only delete keys that clearly belong to the program you are trying to remove. Do not touch any system-level keys unless you are absolutely certain of their function.
If you are uncomfortable navigating the registry, stick to the automated tools mentioned in previous sections. The risk of breaking a vital system component is real, and the potential for a non-booting system outweighs the benefit of deleting a single stubborn file. If you do choose this route, take your time and double-check every entry before pressing the delete key.
Comparing Removal Methods
Choosing the right strategy depends on the nature of the software and how deeply it has integrated itself into your system. The following table provides a quick reference to help you decide which approach is best for your current situation.
| Method | Efficiency | Risk Level | Complexity |
|---|---|---|---|
| Control Panel | Low | Very Low | Minimal |
| Microsoft Troubleshooter | Medium | Low | Low |
| Third-Party Uninstaller | High | Low | |
| Manual Registry Edit | Very High | High |
Each of these methods serves a specific purpose in the ecosystem of Windows file management. Start with the least invasive options first, and only move toward more complex solutions if the problem persists. You will find that most issues are resolved long before you ever need to touch the registry.
Preventing Future Installation Issues
The best way to handle software that won’t delete is to ensure your programs are installed correctly from the start. Always download software from official websites to avoid bundled “bloatware” that is notoriously difficult to remove later. When installing, pay attention to any checkboxes that ask if you want to install additional components or browser extensions.
Keep your system updated regularly, as Microsoft often releases patches that fix bugs within the Windows Installer service itself. If you frequently test new software, consider using a virtual machine or a “sandbox” environment. These tools allow you to install and remove programs in a container that doesn’t affect your main Windows installation.
* Always download from the official developer website.
* Avoid clicking through installers without reading the prompts.
* Use a dedicated folder structure for your applications.
* Regularly clear your temporary files using Disk Cleanup.
* Keep a record of what you have installed recently.
Maintaining a clean and organized system is an ongoing process. By being mindful of what you install and using the right tools to manage those programs, you will avoid the frustration of dealing with applications that refuse to go away. Consistency is the key to a healthy and fast computer.
Frequently Asked Questions
Why does a program still show up after I have deleted its folder?
When you simply delete a folder, you are only removing the program files, not the registration data. Windows still believes the software is installed because the registry keys and configuration files remain in the system. You must use an uninstaller to remove these hidden references properly.
Is it safe to force delete a program if the uninstaller is missing?
It is generally safe to remove the files, but you should use a tool like the Microsoft Troubleshooter first. Simply deleting files can leave your registry cluttered with broken links. Using a proper uninstallation tool ensures that these leftover fragments are cleared out along with the main files.
What if I get an “Access Denied” error during removal?
This error usually means the program is still running in the background or you don’t have administrative privileges. Open your Task Manager to kill any active processes associated with the app. If that doesn’t work, try restarting your computer in Safe Mode to gain the necessary permissions.
Will using a third-party uninstaller damage my Windows registry?
Reputable third-party uninstallers are designed to identify and remove only the specific keys associated with the program. They are significantly safer than manual registry editing. Always ensure you are using a well-known, highly-rated tool to maintain the integrity of your system configuration.
Can I just use the Windows 11 settings menu instead of the Control Panel?
Yes, the modern Settings app in Windows 11 is perfectly capable of handling most uninstalls. However, for deeply stubborn programs, the legacy Control Panel or third-party tools are often more effective. The underlying technology is the same, but the interface for triggering the removal process can vary.
Conclusion
Taking charge of your computer’s health is a rewarding process that pays dividends in performance and stability. By knowing how to address programs that won’t delete, you avoid the common pitfalls of a cluttered, sluggish machine. Start with the simple, official tools provided by Microsoft, and don’t hesitate to use specialized software if you encounter a truly stubborn file.
Remember that a bit of patience goes a long way when managing your system files. You now have the knowledge to address these issues head-on, keeping your digital workspace clean and efficient. If you encounter further trouble, feel free to revisit these steps or look into the specific error codes provided by your system to find a tailored solution.