
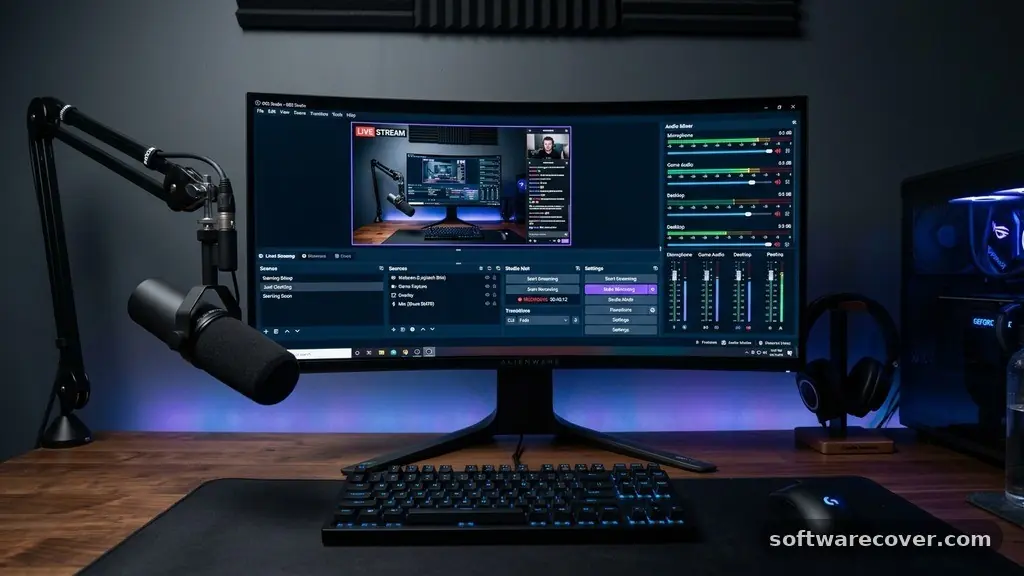
Finding the best Free Software for Recording Your Computer Screen requires balancing ease of use with the features you actually need for your specific projects. Whether you are creating educational tutorials, capturing gameplay, or documenting software bugs, the right tool makes the process frictionless and professional.
This article explores the top-rated options available today, helping you identify which software fits your workflow without costing a dime. By understanding the core strengths of each application, you can make an informed decision that saves you time and improves the quality of your digital output.
OBS Studio: The Professional Standard
When professionals discuss the best Free Software for Recording Your Computer Screen, OBS Studio is almost always the first recommendation. This open-source powerhouse is widely considered the industry standard for high-quality streaming and local recording. Because it is completely free and lacks restrictive watermarks, it has become the go-to choice for content creators who need granular control over their output.
The software excels because it allows you to create complex scenes using multiple sources. You can layer your webcam, desktop capture, browser windows, and specific application audio simultaneously. While the interface might look intimidating to a beginner, the sheer depth of its configuration options is unmatched in the free market.
You can set up custom hotkeys to trigger transitions, mute specific audio channels, or switch between different camera angles during a live session. It supports high-bitrate recording, ensuring your final file looks crisp and professional. For those who want to learn more about video standards, the World Wide Web Consortium provides extensive documentation on web graphics and video formats that underpin modern recording technology.
ShareX: Lightweight and Efficient
If you want a tool that stays out of your way until you need it, ShareX is an excellent choice. It is a lightweight, open-source project that focuses on speed and productivity. While it is primarily known as a screenshot tool, its screen recording capabilities are surprisingly robust and efficient.
You can initiate a recording with a simple keyboard shortcut, choosing to capture a specific window, a region, or your entire monitor. This makes it ideal for quick demonstrations where you don’t want to launch a heavy application. It also provides immediate post-capture options, such as automatically uploading your file to a cloud storage service or saving it to a specific local folder.
Because it lacks a heavy user interface, it consumes very few system resources. This is particularly helpful if you are using an older machine or working on a laptop with limited processing power. While it doesn’t offer a built-in video editor, its ability to quickly generate GIFs or MP4 files makes it a staple for developers and support staff.
Windows Game Bar: Built-in Convenience
Many users overlook the tools already installed on their operating system. If you are running Windows 10 or 11, the Xbox Game Bar is a powerful, integrated option for recording your screen. You do not need to download or install any extra software to get started.
You can open the overlay by pressing the Windows key plus the letter G on your keyboard. This brings up a panel where you can manage your audio levels, monitor system performance, and start a screen recording instantly. It is specifically optimized for gaming, but it works perfectly for recording any application window you have open.
The primary limitation is that it cannot record your desktop or File Explorer directly; it must be focused on a specific application. Despite this, it is arguably the most accessible choice for anyone needing to capture a quick video clip without any setup time. It is a reliable, no-nonsense solution that leverages the hardware acceleration already present in your PC.
Comparing Free Recording Solutions
To help you decide which tool fits your needs, it is useful to compare them based on specific use cases. The table below outlines how these popular choices stack up against one another in terms of complexity and primary functionality.
| Software Name | Best For | Learning Curve | System Impact |
|---|---|---|---|
| OBS Studio | Complex Productions | High | Moderate |
| ShareX | Quick Captures | Low | Minimal |
| Xbox Game Bar | Casual Users | Very Low | Minimal |
| ScreenPal | Education/Training | Low | Moderate |
ScreenPal: A Balanced Approach
Formerly known as Screencast-O-Matic, ScreenPal offers a freemium model that is highly popular in educational environments. The free version provides a solid set of tools for recording your screen and webcam simultaneously. It is designed to be intuitive, making it a great choice for teachers or students who need to create quick instructional content.
The interface is approachable, guiding you through the recording process with clear buttons and simple menus. It allows for basic trimming of your videos, which is a convenient touch that saves you from having to move your files into a separate editing program. You can also add annotations or highlights during the recording process, which helps draw attention to specific parts of your screen.
One thing to keep in mind is that the free version adds a small watermark to your videos. If you are creating content for professional internal use or personal archives, this is rarely an issue. For those who need a polished look without the watermark, the paid upgrade is an option, but the free version remains a highly functional starting point.
Key Considerations for Quality Recordings
Choosing the best Free Software for Recording Your Computer Screen is only half the battle. Your final video quality depends heavily on your hardware and your environment. Even the most powerful software cannot compensate for poor lighting or a low-quality microphone.
* Check your frame rate: A standard 30fps is fine for tutorials, but 60fps is better for gaming.
* Test your audio: Always record a 10-second test clip to ensure your microphone levels aren’t peaking or distorted.
* Clear your desktop: A cluttered workspace can be distracting for your viewers and might reveal sensitive information.
* Use a stable internet connection: If you are planning to stream your recordings, ensure your upload speeds can handle the bitrate you choose.
By keeping these factors in mind, you ensure that your recordings look professional regardless of which software you select. Take the time to adjust your settings before you start your main project, as small tweaks often lead to significantly better results.
Managing Your Video Files
Once you finish your recording, you need a plan for storage and management. Video files can grow quite large, especially if you are recording in high resolution or at high frame rates. You should designate a specific folder on your hard drive for all your raw captures to keep your system organized.
Consider using a tool like Handbrake to compress your videos if you intend to share them online. Compression allows you to maintain high visual quality while reducing the file size, making uploads much faster. It is a common practice for creators who work with long-form content or high-definition footage.
Naming your files consistently also helps in the long run. Use a format that includes the date and the project name, such as “2025-05-12_ProjectName_Draft1.mp4.” This simple habit will save you hours of searching through your folders when you need to find an old clip for a new edit.
Frequently Asked Questions
Does Windows 11 have a built-in screen recorder?
Yes, Windows 11 includes the Xbox Game Bar, which is a fully functional screen recorder. You can access it at any time by pressing the Windows key plus the G key on your keyboard.
Is there a time limit on free screen recorders?
Most of the options mentioned, such as OBS Studio and ShareX, have no time limits. Some freemium software, like the free version of ScreenPal, may limit the length of individual recordings, so check the specific software terms.
Can I record my webcam and screen at the same time?
Yes, many programs like OBS Studio and ScreenPal are designed specifically to combine your webcam feed with your screen capture. You can resize and move your webcam window anywhere on the screen.
Do these programs record internal computer audio?
Most modern screen recording software, including OBS Studio, can capture system audio. You may need to adjust your settings within the app to ensure your desktop sound is routed to the recording correctly.
Which software is best for beginners?
If you are new to screen recording, start with the Xbox Game Bar for simplicity or ShareX for quick, lightweight captures. These tools require very little configuration and get the job done immediately.
Final Thoughts on Screen Recording
Selecting the best Free Software for Recording Your Computer Screen is a personal choice that depends on your technical comfort level and your project goals. If you want total control, OBS Studio is the clear winner for its vast array of features and flexibility. For those who prioritize speed and ease of use, built-in tools or lightweight apps like ShareX offer a more streamlined experience.
Regardless of your choice, the most important step is simply starting your first recording and testing your settings. With a bit of practice, you will find that capturing your screen becomes a natural part of your digital workflow, whether you are creating content for others or documenting your own work. Feel free to download one of these tools today and start experimenting with your own high-quality captures.